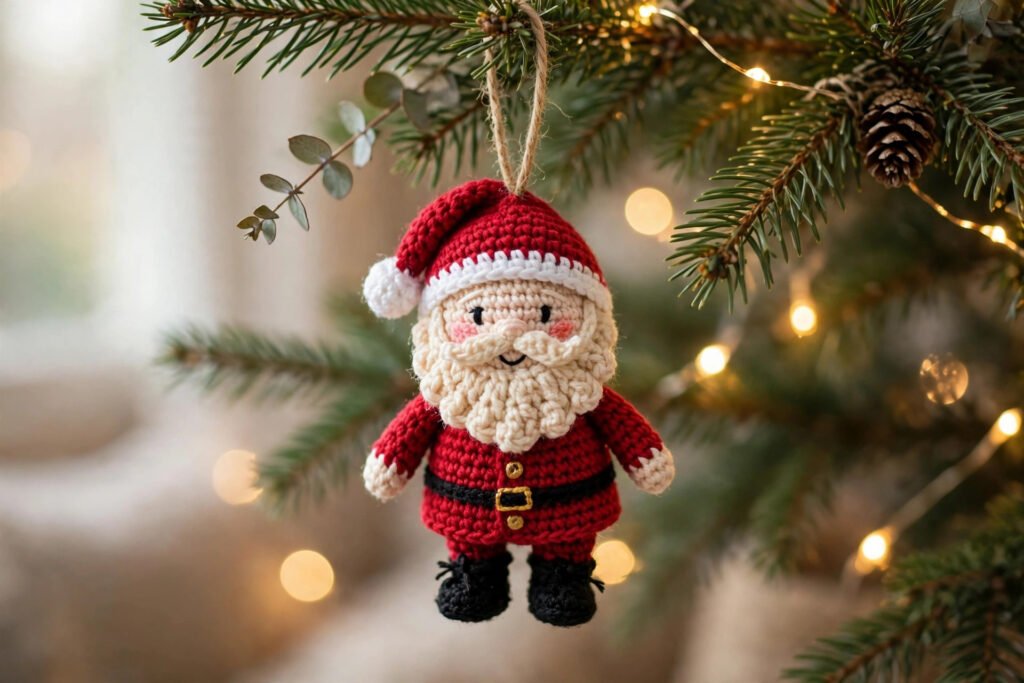
Why Santa is the perfect first amigurumi
Amigurumi looks complicated until you make your first one, and then it looks like the most forgiving craft in the world. There are no buttonholes, no zips, no fitting. A Santa ornament is the ideal beginner project because every part is a simple shape — a round body, a round head, a cone hat — and because Santa is supposed to look soft and a little lumpy. That is why a crochet amigurumi santa ornament for beginners is such a good place to start: the character hides your learning curve, and the finished ornament looks like it took far more skill than it did.
At about 12 cm tall, Santa is big enough to show on the tree and small enough to finish in one evening. Make one for your own tree, then make a second for someone else, because nobody who receives a handmade Santa puts it back in the box in January.
Gauge first, always
What 20 stitches across 10 cm means
Crochet sizing comes from stitch count, not from a paper template, so gauge is the whole game. For this Santa you want 20 stitches across 10 cm, worked in DK cotton yarn with a 3.0 mm hook. Crochet a test square first and count honestly. If your count is loose, go down a hook size. If it is tight, go up a hook size. Do not skip this step and hope: a Santa crocheted too loosely will show stuffing through the red coat, and a Santa crocheted too tightly will be stiff and hard to stuff evenly.
Why cotton yarn suits ornaments
DK cotton holds its shape, shows stitch definition clearly, and does not shed fluff onto the tree. Acrylic is softer and cheaper, but it stretches under stuffing over time, and a Santa that slowly sags is a Santa that stops looking cheerful. Cotton costs a little more per ball and gives you an ornament that still looks right in five years.
What you need before you start
Yarn and hook
You need DK cotton yarn in red, cream, charcoal and a skin-tone shade, plus scraps for the belt and boots. About 25 g of red and 15 g of cream covers the whole ornament, which makes Santa an excellent stash project. A 3.0 mm hook suits most crocheters at this gauge, but trust your test square over the label on the yarn.
Stuffing, eyes and loop
Use a small amount of toy stuffing, and stuff firmly but not hard. Over-stuffing is the beginner mistake that turns a round Santa into a hard ball; under-stuffing turns him into a flat Santa. Safety eyes work well, but black yarn embroidered as eyes is safer if the ornament is for a house with small children. A 12 cm ribbon loop, folded, is the hanging loop — sewn through at least two stitches at the top of the hat, never just one.
Step 1: Body, face and beard
Crochet the body in the round
Work the body as a round shape in the round, increasing evenly and then decreasing to close. Keep your stitch marker in place, because losing your place in the round is how a Santa ends up with a mysterious extra bulge. Stuff as you go rather than all at the end: stuffing a closed shape evenly through a small hole is frustrating, and lumps show through red yarn.
Sew the face and beard first
Sew the face round and the cream beard to the front, centred, before you add any other piece. This order matters. Once the hat brim is on, you cannot reach the top edge of the beard to stitch it flat, and once the boots are on, the body is harder to hold steady. Pin the beard in place and step back before you sew: a beard sewn half a centimetre off-centre is the first thing anyone notices, and moving a pinned beard costs nothing.
Step 2: Hat, boots and belt
Tilt the hat
Sew the hat to the top of the head with a slight tilt. A straight hat looks stiff; a tilted hat looks cheerful, and it costs nothing. Add the cream brim and the pompom last, after the hat is attached, so the brim sits exactly where the hat meets the head. The pompom should be small and firm, not a fluffy explosion — this is an ornament, not a bobble hat.
Boots flat, belt level
Sew the two boots flat at the base so Santa can stand on a shelf as well as hang on the tree. An ornament that works two ways gets displayed twice as often. Add the two eyes level with each other above the beard, because eyes at different heights are the first thing anyone notices after the beard. Wrap the charcoal belt strip level round the middle of the body and stitch it at the back, so it cannot slide down on the tree.
Step 3: Loop and hanging test
Sew the loop through two stitches
Fold the ribbon into a loop and sew it to the top of the hat through at least two stitches. One stitch will hold for a week; two stitches will hold for years. Use the same yarn as the hat top for the stitching, because a contrasting thread line across the top of the hat reads as a mistake.
Hang before you gift
Hang Santa on a branch before you wrap him, and check three things: he hangs upright, his face points forward, and he does not tip toward his beard. A Santa that tips forward is usually a Santa stuffed heavier at the front than the back, and the fix is to open the body slightly and shift a little stuffing to the back. Do this now, not after gifting, because nobody wants to unpick a present.
Mistakes that spoil an otherwise good Santa
Stuffing too hard
A Santa stuffed like a cricket ball will not sit right, will not hang right, and will show every stitch stretched. Stuff until the shape is firm and round, then stop. You should be able to press the body in slightly with a finger and watch it spring back.
Eyes at different heights
Mark both eye positions with pins before you sew either eye. Eyes are the whole face at this scale, and a millimetre matters. Step back and look from a normal distance, not from two centimetres away, because nobody views a tree ornament from two centimetres away.
A hat sewn straight on
A hat sewn dead straight makes Santa look like a soldier. Tilt it. Even a few degrees changes the whole character, and it is the cheapest personality upgrade in crochet.
Ways to make Santa your own
Change the coat trim
Cream trim is classic, but a sage green trim suits a modern tree, and a gold trim suits a glamorous one. The pattern stays the same; only the accent yarn changes, and the whole ornament changes with it.
Make a set
Santa pairs beautifully with a reindeer and a penguin, and a set of three ornaments in matching yarn reads as a collection rather than three separate makes. Keep the yarn and the hook the same across the set so the sizes stay consistent.
Personalise the belt
A tiny buckle stitched in gold yarn on the belt is a lovely detail, and it gives children something to look for on the tree. Keep it small and flat, or it will catch on branches.
A Santa worth hanging
A crochet Santa ornament is a small project with a big payoff. It teaches gauge, working in the round, stuffing and assembly on a forgiving scale, and it produces something that comes out of the box every December. Get the gauge right, sew the beard before the hat, tilt the hat, and hang-test before you gift, and you will have a Santa that looks like far more skill than it took.
Ready to crochet him? The full pattern is here: Crochet Amigurumi Santa Ornament Pattern. And for his companion on the tree, read Crochet Christmas Angel Ornament for Beginners next.