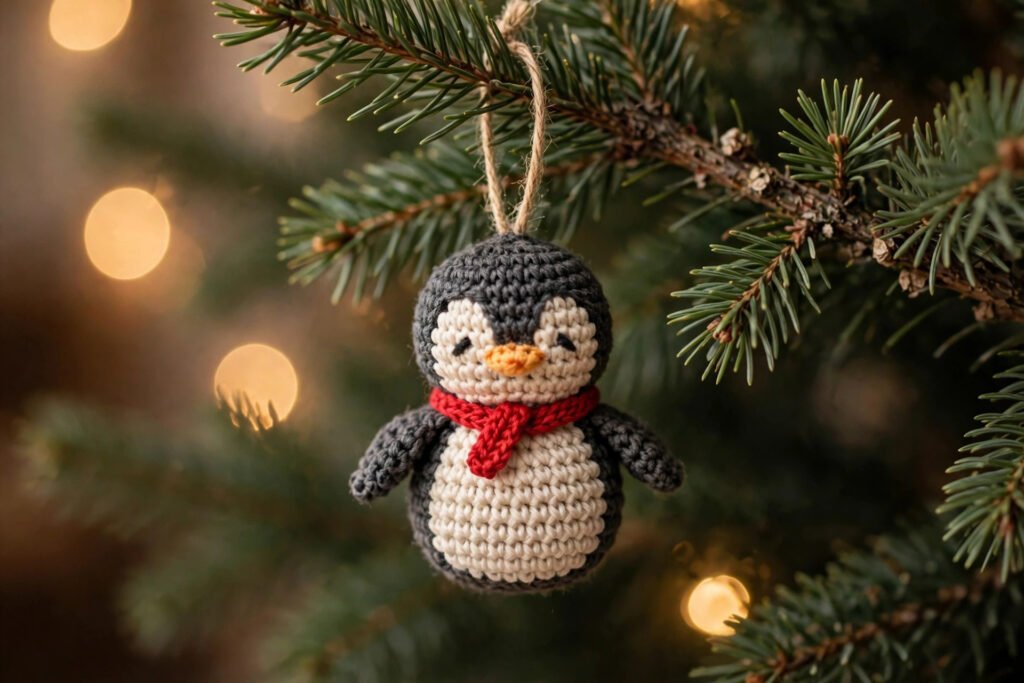
Why a penguin is a great second amigurumi project
If you have crocheted one ball-shaped ornament before, a penguin is the perfect next step. The body is still a ball, just stretched into an oval, and everything else is a small flat piece sewn on: a belly patch, two wings, two feet, a beak, and a scarf. Nothing in this project requires a technique you have not already met, but putting the pieces together teaches the skill that matters most in amigurumi, which is placement. A penguin with its eyes level and its belly centred looks charming. A penguin with one eye higher than the other looks surprised in a way nobody intended.
This crochet penguin ornament for beginners stands about 15 cm tall, so it works both hanging on the tree and standing on a shelf. That double life makes it a good gift: the recipient can choose where it lives.
What you need
Yarn and hook
DK cotton yarn in charcoal and cream does most of the work, about 25 grams of charcoal and 10 grams of cream, plus small scraps of orange for the feet and beak and red for the scarf. Cotton holds its shape well for a stuffed ornament and shows the belly patch crisply against the dark body. A 3.0 mm hook suits DK cotton, but gauge matters more than the hook number: you want 20 stitches across 10 cm, so the stuffing does not show through. Adjust your hook until you hit that count.
Eyes and stuffing
You need two eyes. Safety eyes are quick and neat, but embroidered eyes in black yarn are safer if the ornament will go to a small child, because safety eyes can work loose over time. Either choice works; just make sure both eyes match. You also need a small amount of toy stuffing and a 12 cm length of ribbon for the hanging loop.
Step 1: Gauge, body and belly
The test square
Crochet a test square and count your stitches across 10 cm before you start. Twenty stitches is the target. If your count is loose, go down a hook size; if it is tight, go up one. Five minutes here saves an ornament with stuffing showing through its belly, which is the kind of flaw that is obvious on a dark body.
Body first, belly second
Crochet the body as an oval in the round and stuff it firmly but not hard. A penguin stuffed too hard looks like a ball and will not sit properly; a penguin stuffed too softly will slump. Firm but squashable is the feel you want, like a stress ball rather than a tennis ball.
Sew the cream belly patch to the front next, before anything else. This order matters more than it seems. Once the wings are on, you cannot reach the belly edges to stitch them flat, and a belly patch with a curling edge looks unfinished. Centre the patch carefully: it should sit symmetrically on the body, with equal charcoal showing on both sides. Pin it in place and step back before sewing, because a pinned patch can be moved in seconds and a sewn patch cannot.
Step 2: Wings, feet, face and scarf
Wings and feet
Sew the two wings to the sides of the body so they point slightly outward, like a penguin mid-waddle. Sew the two feet flat at the base, positioned so the penguin can stand on a shelf without tipping forward. Feet placed too far back make the penguin fall on its face; feet placed too far forward make it lean back. Test the standing position before you sew the feet down by simply balancing the body on them.
Face: the detail that decides everything
Add the small orange beak centred above the belly patch, then the two eyes level with each other. Eyes at different heights are the first thing anyone notices on a finished amigurumi, and they are the hardest flaw to ignore. Measure, if it helps: count stitches across from the centre line to each eye and make the counts match. There is no prize for eyeballing it when counting takes ten seconds.
Scarf last
Wrap the short red scarf round the neck and stitch it in place at the back, so it cannot slide off on the tree. The scarf is the piece that turns a grey-and-white bird into a Christmas penguin, so take a moment with it. It should sit snugly without strangling the neck shaping, and its ends should hang evenly.
Step 3: Loop and hanging test
Fold the 12 cm ribbon into a loop and sew it to the top of the head through at least two stitches, using the same yarn as the head top so no contrasting thread line shows across the top. Then hang the penguin and check two things: that it hangs upright with its face forward, and that it does not tip toward its beak. A penguin that tips forward has its stuffing distributed too far forward or its loop sewn too far back; either way, adjust now rather than after gifting.
Common beginner mistakes
Sewing the belly on last
Wings block access to the belly edges. Always sew the belly patch before the wings. This single ordering rule prevents the most common finishing flaw in this project.
Uneven eyes
Count stitches from the centre line to each eye. Symmetrical eyes transform the whole ornament, and the counting takes seconds.
Stuffing too hard or too soft
Aim for firm but squashable. If your penguin cannot stand, it is probably over-stuffed at the base or under-stuffed overall. Adjust the stuffing before you sew the final pieces on, while you can still reach inside.
A loop sewn through one stitch
A loop through one stitch will pull out. Sew through two stitches and pass the yarn through twice. It is ten extra seconds for an ornament that lasts years.
Pairing the penguin with other ornaments
A penguin looks best on a tree mixed with long, thin ornaments, because its round body breaks up the vertical lines. Striped candy canes are the natural partner: the cane’s red and white stripes against the penguin’s charcoal and cream give the tree contrast without clashing. Our crochet candy cane ornaments for beginners use the same DK cotton and the same gauge method, so the two projects share a stash and a skill set.
The pattern, if you want it written out
If you would like the full instructions, piece counts, and the gauge guide in one printable document, the Crochet Penguin Ornament pattern is available as an instant-download PDF. It is written for beginners, with the piece order, the placement checks, and the hanging test all spelled out.
Make one this evening
A penguin takes about an hour and a half, which is one evening with a cup of tea. Crochet the body, pin the belly, count the eye stitches, and wrap the scarf. By the end of the evening you will have an ornament with a face, a scarf, and a personality — and a much better feel for how amigurumi pieces come together than any ball-shaped ornament could teach you.