Why coasters are the smartest small Christmas project
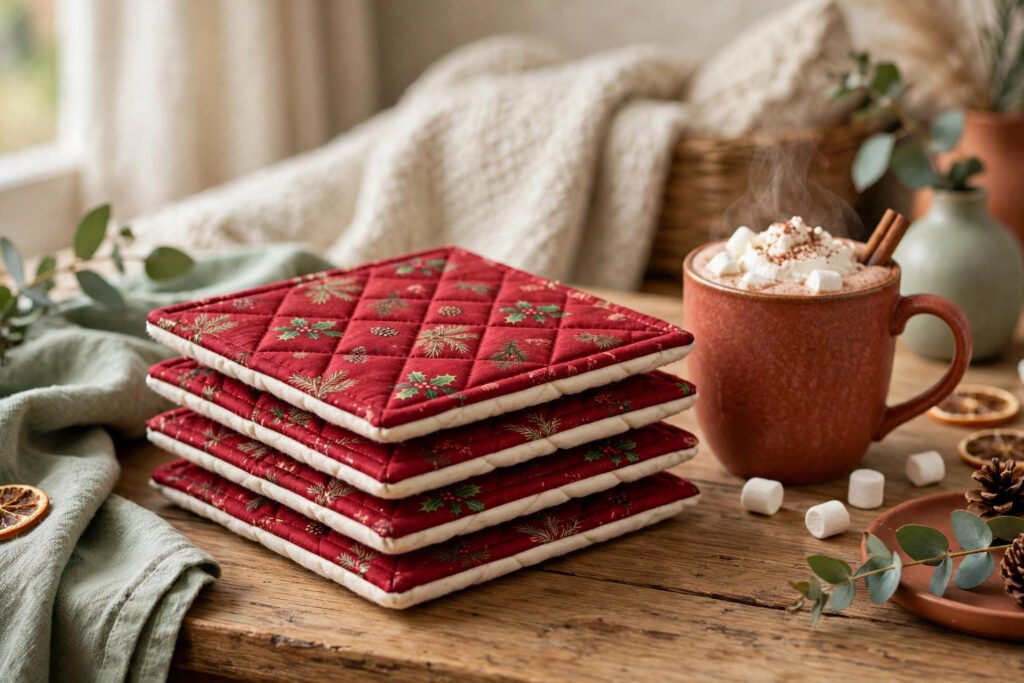
Quilted Christmas coasters are the perfect small sewing project. They are quick, useful, and forgiving, and they make a wonderful gift because almost everyone uses them. Learning how to sew quilted christmas coasters does not need fancy piecing or special tools. With straight seams, a light batting, and a simple turn-and-topstitch finish, you can make a set of four coasters in an afternoon, and they will actually protect a table, not just decorate it.
The coasters in this guide finish at 12 cm square, which suits most mugs and glasses without looking oversized.
Choose fabric and batting for a coaster that works
Quilting cotton on top, plain cotton behind
Choose quilting cotton for the top. It presses crisply, sews predictably, and comes in Christmas prints that read well even at a small scale. A medium-scale print works best for a 12 cm coaster. Very large prints can be lost when the coaster is cut small, while very small prints can look busy once the coaster is quilted. A mix of a Christmas print on top and a coordinating solid on the back gives a clean, intentional look that suits any table.
Light batting only, never high-loft
For batting, use a thin cotton batting, or a single layer of cotton batting plus a layer of absorbent fabric, such as flannel, if you want extra protection against condensation. Do not use thick, high-loft batting for coasters. It makes them puffy, unstable, and hard to stack, and a mug placed on a puffy coaster can wobble. Low-loft batting, quilted at a moderate spacing, keeps the coaster flat, stable, and easy to store in a stack.
Cut squares and quilt them simply
Cut the top fabric, batting, and backing all to 14 cm square for a finished 12 cm coaster, allowing 1 cm seam allowance on each side. Cut several sets at once if you are making a set, and label them if you are using different prints, so you do not mix up tops and backs. Press all pieces before you sew, because creases from the shop can make small squares harder to align, and a square that starts crooked will finish crooked.
Layer each set with the backing right side down, the batting in the middle, and the top right side up. Pin from the centre outward, or baste lightly, so the layers do not shift. Quilt each coaster before you assemble it, using straight lines, a simple grid, or diagonal lines about 3 cm apart. Straight-line quilting is the most forgiving choice, and a walking foot helps feed the layers evenly, but a standard foot can work if you go slowly and pin well.
Sew, turn, and topstitch for a clean edge
Place the quilted top and the backing right sides together, with the batting already attached to the top. Pin all the way around, leaving a turning gap of about 5 cm on one side. Sew around the square with a 1 cm seam allowance, backstitching at the start and end of the gap. Go slowly around the corners, and if your machine struggles over the thickest points, turn the handwheel for a stitch or two rather than forcing the fabric through.
Trim the corners diagonally, close to but not through the stitching, so the corners turn out square without bulk. Turn the coaster right side out through the gap, using a blunt tool to gently push the corners out. Do not use scissors, because they can poke through the seam. Press the coaster from the front, using a pressing cloth if your fabric is dark, and press the turning gap closed so its edges line up with the rest of the seam. Topstitch all round close to the edge, which closes the gap and stops the coaster curling in use.
Make a set that matches, not just a pile
A set of coasters looks best when it is coordinated, not identical. Use the same backing and batting for all coasters, and vary the tops within one colour family, such as red, cream, and pine green, or a set of four different Christmas prints in the same tones. That variety makes the set interesting on a table, while the shared backing keeps it looking intentional and planned.
Make all the coasters in the same sitting if you can, using the same thread, needle, and quilting spacing. That consistency is what makes a set look like a set, rather than a collection of single experiments. Stack the finished coasters and check them from above. They should be the same size, the same thickness, and the same squareness, even if the prints differ. Tie the set with a simple ribbon or place it in a small basket for gifting, and add a short note about washing, because the recipient will want to know that the coasters can be washed and reused.
Mistakes that spoil an otherwise good coaster
Quilting after assembling
The most common mistake is trying to quilt a coaster after it has been sewn together. Quilt first, while the layers are flat and easy to handle, and the stitching will stay even. Quilting a finished, turned coaster means wrestling a small puffy square under the needle, and the lines will wander. Order matters: layer, quilt, trim, then turn.
A gap pressed open
A turning gap that is pressed open instead of closed will show as a small pucker on one edge, and topstitching will lock that pucker in permanently. Press the gap edges in line with the rest of the seam before you topstitch, and check the edge from the front as well as the back. A coaster edge should read as one continuous line, with no visible join.
Wash, store, and use them every day
Wash quilted coasters gently, on a cool cycle, and dry them flat or hang them to dry. Avoid very hot water on your first wash, because it can shrink the top and backing at different rates if one fabric was not pre-washed. If a coaster curls after washing, press it from the back with steam and a pressing cloth, and it should lie flat again.
Store coasters in a stack, not rolled or folded, so they keep their square shape. A small basket on the coffee table keeps them handy and looks festive in itself. If you make coasters as gifts, make a few extra for yourself. You will use them more than you expect, especially during December, when hot drinks, cold glasses, and festive gatherings all happen at once.
For a matching table, the same quilting and topstitching skills carry over to the How to Sew Quilted Christmas Napkin Rings guide, where a narrow quilted band becomes a table decoration in its own right. For the full set with a printable template, the Quilted Christmas Coasters Sewing Pattern gives you a full illustrated PDF instant download, with the 12 cm template at true size and every step diagrammed.
A quick project with a big payoff
Quilted coasters are one of the quickest Christmas sewing projects, and they transform a table faster than almost anything else you can make in an afternoon. The squares are simple, the sewing is straightforward, and the result is visible every time someone puts down a mug.
Ready to start? Choose a medium-scale print, quilt simply, trim square, and topstitch neatly, and your coasters will lie flat all season, not curl by the second week. Make a set for yourself, make a set for a gift, and keep the method in mind for next year. Once you can make a flat, square, well-finished coaster, you have the core skills for larger quilted projects, from placemats to table runners and beyond.
Ready to sew the set? Get the Quilted Christmas Coasters Sewing Pattern and read How to Sew Quilted Christmas Napkin Rings next.