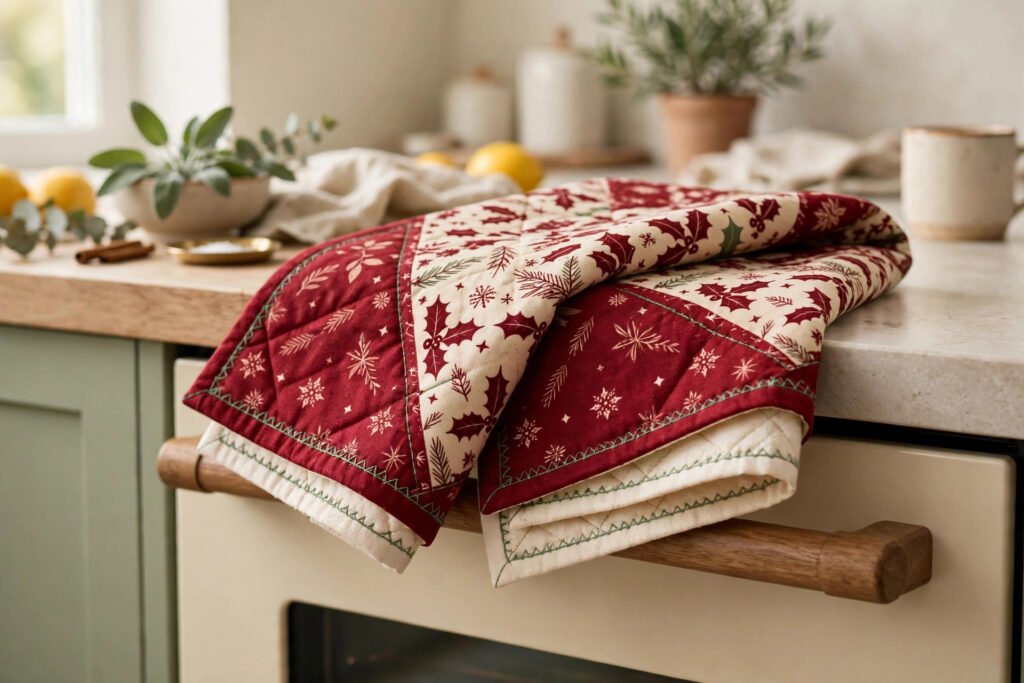
Learning how to sew quilted Christmas tea towels is one of the most satisfying small projects of the festive season, because the result is used every single day rather than stored in a box until next December. A quilted tea towel is thicker than a plain one, so it dries hands properly, protects a worktop from a hot tray, and still folds neatly over an oven handle. When you quilt it yourself, you choose the prints, the backing, and the loop, so the finished towel matches your kitchen. This guide walks through the whole project, from choosing fabric to the final press, for a confident beginner. You do not need a walking foot or any quilting experience, only patience and a willingness to press as you go.
If you would rather start from a ready-made pattern, the companion pattern is here: Quilted Christmas Tea Towels Sewing Pattern. It covers a set of two towels, each finishing at 50 by 70 centimetres, with quilted layers and a hanging loop. The matching kitchen project, How to Sew Quilted Christmas Bowl Covers, pairs beautifully with these towels.
Why quilt a tea towel at all
A plain tea towel is a single layer of fabric, and a single layer soaks through quickly. Quilting adds a layer of batting between the top and the backing, and that middle layer gives the towel its body: it absorbs more before it feels damp, it can double as a trivet for a warm dish, and it stops the towel stretching out of shape in the wash. The stitch lines act like a light skeleton, holding the layers together through dozens of wash cycles.
There is a decorative reason too. Quilted lines turn a simple rectangle into something that looks considered, and a set in deep red print with cream backing and sage topstitching looks like a shop-bought gift set, except that it was made by hand. The quilting does not need to be complicated: straight lines, evenly spaced, look clean and modern, and a line that wanders by a millimetre will not show once the towel is folded over a rail.
Choosing fabric and supplies for quilted Christmas tea towels
Start with quilting cotton for the top, because it holds a crisp fold, prints beautifully, and survives repeated washing. A deep red print with a small festive motif works well for Christmas, and a plain cream or soft sage makes a good backing, since the back of a towel is seen just as often as the front. You need about 1.1 metres of each fabric for a set of two towels, at a standard width of 110 centimetres, plus the same amount of light batting. Light batting is important: heavy batting would make the towel stiff, like a placemat, and it would not fold over a rail or dry hands properly.
Beyond fabric, the list is short: matching thread, pins or clips, scissors or a rotary cutter, a ruler, and an iron. The iron is not optional. Pressing each layer before quilting and pressing the binding as you turn it are what separate a towel that looks finished from one that looks unfinished. A walking foot helps, but it is not required for straight lines on a towel of this size, provided you pin well and sew slowly.
Cutting and layering without shifting
Cut each towel top, backing, and batting at 52 by 72 centimetres, which allows a 1 centimetre seam allowance all round on the finished size of 50 by 70 centimetres. Stack them in order, top, batting, backing, so you cannot mix up the layers later. Cut generously and trim after quilting rather than before, because quilting can pull the layers slightly out of true, and trimming afterwards corrects that drift.
Layer each towel with the backing face down, the batting in the middle, and the top face up, then pin from the centre outward. Pinning from the centre pushes any fullness toward the edges, where it can be trimmed away, instead of trapping it in the middle as a bubble. Use more pins than you think you need, and check the layers lie flat before you sew; if the table is too small, layer the towel on the floor or a bed.
Quilting lines that stay soft and even
Quilt straight lines 5 centimetres apart along the length of each towel, starting from the centre line and working outward. Lines closer together would make the towel stiff, and lines further apart would let the layers shift in the wash. At five centimetres, the towel keeps its softness, the batting stays put, and the lines become a visible design feature. Sew slowly and let the feed dogs do the work: pushing stretches the top layer, and pulling puckers the backing.
Quilt both towels before finishing either one. Comparing two quilted towels side by side shows at once whether a line has drifted or one towel has ended up narrower than the other, and fixing a problem now costs nothing, because the edges are not bound yet. After quilting, trim each towel to exactly 50 by 70 centimetres, squaring the corners with a ruler. A rectangle whose diagonals match is square, and a square towel hangs straight.
Binding, loops, and a finish that lasts
Bind all four edges of each towel with a turned edge, pressing as you go, so no raw edge is left to fray. A turned edge is simpler than separate bias binding and suits a towel, because there is no bulky seam to catch on dishes. Press the edge in, then press it again, so the fold is crisp before it reaches the machine. Then fold each hanging loop tab from the pattern template, press it, and sew it firmly at the top centre of its towel through several layers. The loop takes the whole weight of a damp towel every time it is hung, so sew it with two rows of stitching. One row holds it, and the second row is what keeps it holding after fifty washes.
Topstitch all round each towel close to the edge. This final row locks the binding flat, closes any small gaps in the turned edge, and gives the towel a finished outline. Use a slightly longer stitch than for piecing, because a longer stitch sits more smoothly over several layers. Press the towel again with steam, and check the loop stands up just enough to hook over a rail without folding flat.
Washing and care
Wash quilted tea towels on a cool cycle and dry them flat or on a line. Cool washing protects the prints and keeps the batting from clumping, and pressing a towel while it is still slightly damp flattens any curled corners. Skip fabric softener, because it coats the fibres and reduces absorbency. Wash both towels together and rotate them in use, so the set ages evenly instead of one towel fading faster than the other.
Gifting a set that looks shop-bought
A set of quilted Christmas tea towels makes an excellent gift, because it is useful, personal, and seasonal without being fragile. Tie the two towels together with a simple ribbon, add a small card with washing instructions, and the gift is complete. If you are making several sets, work in batches: cut all the towels first, then quilt them all, then bind them all. Batch working is faster and keeps the sets consistent.
Before gifting, hang each towel by its loop on your own oven handle or hook and check that it hangs straight, that the loop fits, and that the 70 centimetre length clears the floor and any hob below. This is the honest fit check for a project with no sewn sample, and it takes less than a minute. A towel that hangs well in your kitchen will hang well in someone else’s, and a towel that pulls to one side can still be fixed with a few stitches before it is wrapped. Ready to start? Sew your own set with the Quilted Christmas Tea Towels Sewing Pattern, and make the matching quilted Christmas bowl covers next for a kitchen set that looks made to order.