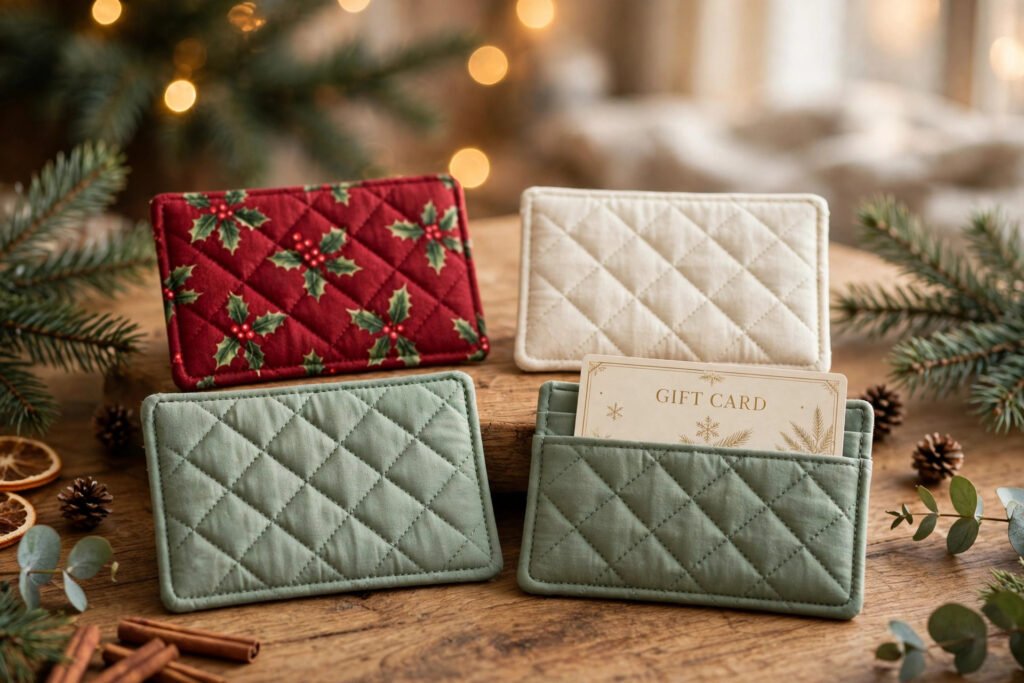
Why a gift card deserves better than an envelope
A gift card in a shop envelope says you remembered at the last minute, even when you did not. A gift card in a small quilted holder says you thought about the person twice: once when you chose the card, and once when you made something to carry it. That is why learning how to sew quilted christmas gift card holders is such a satisfying December project. Each holder takes well under half an hour once you have the rhythm, the fabric cost is almost nothing because they are perfect for scraps, and the result turns the least personal gift of Christmas into something that looks handmade.
A set of four covers most Christmas lists in one sitting, and the holders are reusable: the recipient keeps a pretty little pouch long after the card is spent.
What size should a gift card holder be?
The card sets the size
A standard gift card measures about 8.5 cm by 5.4 cm, roughly the size of a bank card. A holder needs to be a little bigger than the card, or the card will bend every time it goes in and out. Our holders finish at 11 cm by 9 cm: wide enough to slide a card in without a fight, tall enough that the card sits deep in the pocket and does not fall out in a handbag.
Why quilted, not just lined?
A single layer of cotton feels flimsy for something meant to protect a card. Quilting adds body, so the holder keeps its shape, and it adds a layer of padding, so the card inside is protected from keys and coins. The quilting also gives you the chance to show off a Christmas print properly: diagonal lines across a small red print read as deliberate, expensive-looking texture.
What you need before you start
Fabric and batting
You need an outer cotton, a lining cotton and a light batting for each holder. Christmas prints with small or medium motifs work best, because a holder is only 11 cm wide and a giant motif will be cropped in strange places. For the lining, a plain cream keeps the inside clean and makes the card easy to see when it slides in. Light cotton batting is the right weight; heavy batting makes a holder too stiff to fold around a card.
Binding
Each holder needs about 45 cm of binding, cut 5 cm wide, or roughly 1.8 metres for the set of four. A contrasting binding frames the holder beautifully — sage green against a red print is a classic Christmas combination — and it finishes every raw edge in one step. Binding cut from your own fabric looks more considered than ready-made, and it costs less.
Step 1: Quilt the backs
Layer in the right order
Lay the lining face down, then the batting, then the outer fabric face up. Smooth each layer outward from the centre so no wrinkles are trapped inside. Pin well. On a piece this small it is tempting to skip pinning, but a holder that shifts while you quilt will end up with a wrinkle right across the front, and at this size there is nowhere for a wrinkle to hide.
Quilt diagonal lines
Quilt diagonal lines about 3 cm apart, working from the centre outward. Straight lines suit small Christmas prints perfectly, because the diagonal grid reads as texture rather than competing with the print. Use a slightly longer stitch than for garment sewing, around 3 mm, so the quilting does not pucker the fabric. A walking foot helps but is not essential if you pinned well and sew slowly.
Trim to size
After quilting, trim each back to exactly 11 cm by 9 cm and square the corners. This is the moment the set starts to look like a set. If one holder is 10.5 cm and another is 11.5 cm, stacked together the difference is obvious. Trim all four from the same template and measure twice before you cut.
Step 2: Bind the pocket, then sew it on
Finish the pocket edge first
Bind the top edge of each pocket piece before you sew the pocket to the back. Once the pocket is attached, that top edge is almost impossible to finish neatly, and a raw or fraying pocket edge is the first thing a recipient will notice when they slide the card in. A bound pocket edge also makes the pocket mouth stiffer, so it stays open just enough to accept the card.
Sew the pocket to the back
Lay each pocket over its quilted back, lining up the bottom and side edges, and sew the two sides and the bottom closed. Keep your seam allowance even, because an uneven pocket is a pocket that grips the card on one side and drops it on the other. Test the pocket with a real gift card before you bind the holder: a card that slides in easily but does not fall out when you tip the holder is exactly the fit you want.
Step 3: Bind all round and press
One run, mitred corners
Bind all round each holder in one run, mitring the corners. At each corner, fold the binding into a mitre and press the fold before you continue, because a mitre pressed flat stays flat, while one sewn over a fold will always puff up. Fold the binding to the back and slip-stitch or topstitch it down, keeping the stitch line even all the way round.
Press and check the set
Press all four holders flat and stack them. Check that every holder measures the same 11 cm by 9 cm, and slide a card into each one. If one holder is a few millimetres out, re-trim and re-bind that one before the set is finished. A set only reads as a set when the sizes match, and the recipient will compare them, even if they do not mean to.
Mistakes that spoil an otherwise good holder
Skipping the card test
The most common mistake is finishing all four holders before testing a single pocket with a real card. Cards vary slightly in thickness, especially gift cards with raised numbers, and a pocket sewn too tight will bend a card every time it goes in. Test early, test with the thickest card you own, and adjust the pocket before you bind.
Binding that is too narrow
Binding cut too narrow is hard to fold to the back and harder to stitch down neatly. Cut it 5 cm wide, not 4 cm. The extra centimetre costs nothing and makes the difference between binding that fights you and binding that behaves.
Prints that fight the quilting
A very busy, large-scale print plus dense quilting equals visual noise. If your outer fabric is loud, quilt wider apart. If your outer fabric is quiet, quilt closer together. Let one of the two do the talking.
Ways to make the set your own
Mix prints, keep the binding constant
Four holders in four different Christmas prints, all bound in the same sage green, look like a designed collection rather than four leftovers. This is also the fastest way to use up a scrap basket: each holder needs so little fabric that a fat quarter yields several.
Add a tiny tag
A small fabric tag tucked into the binding, stamped or embroidered with the recipient’s initial, turns a useful holder into a keepsake. Keep the tag small and flat, or it will catch on the card every time it slides in.
A set that earns its place under the tree
Quilted gift card holders are small, fast and genuinely useful, which is a rare combination in Christmas sewing. They use scraps, they teach binding and mitred corners on a forgiving scale, and they turn the easiest gift of the season into something that looks considered. Make the set of four, keep the binding consistent and test every pocket with a real card.
Ready to sew the set? The full pattern with the true-size holder template is here: Quilted Christmas Gift Card Holders Sewing Pattern. And if your table needs the same treatment, read How to Sew Quilted Christmas Candle Mats next — same binding skills, bigger stage.