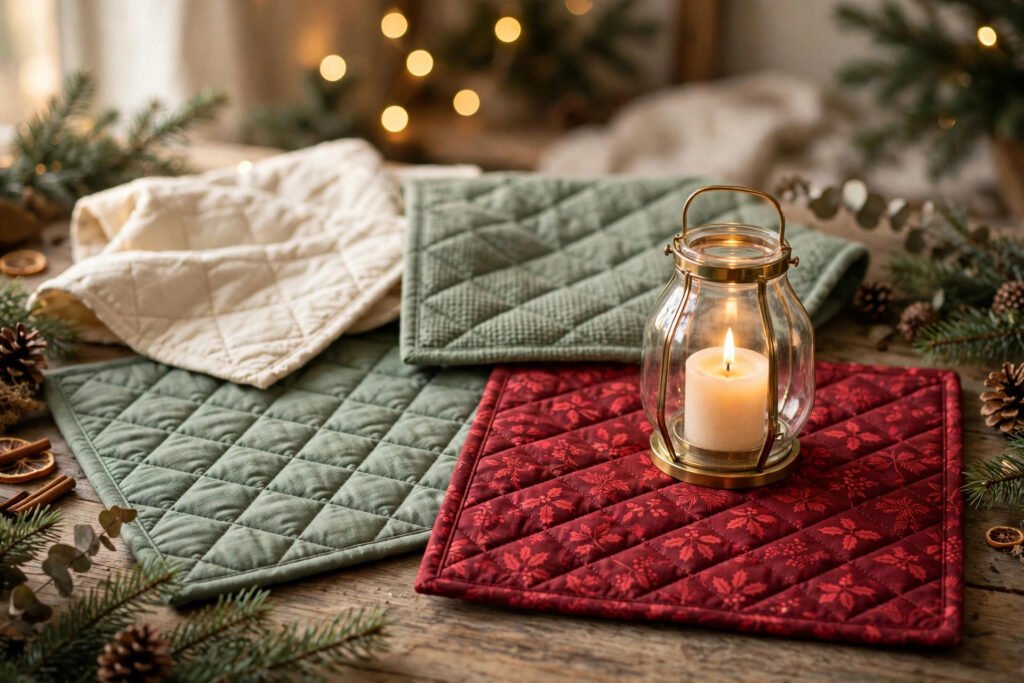
Why a candle needs a mat
A candle on a bare table looks like an afterthought. A candle on a quilted mat looks like a centrepiece. The mat does three jobs at once: it protects the table from heat and wax, it frames the candle so the eye knows where to look, and it ties the candle into the rest of the table’s Christmas colours. That is why learning how to sew quilted christmas candle mats is such a good December project. Each mat is a simple square, the skills are the same ones you use for napkins and placemats, and the result makes an ordinary jar candle look deliberate.
A set of four 25 cm square mats covers a long table, a mantelpiece, or four separate rooms. Put one under each lantern on the Christmas table and the whole table looks dressed, even before the food arrives.
What size should a candle mat be?
Big enough for the candle, small enough for the table
Twenty-five centimetres square is a good size for a candle mat. It is big enough for a large jar candle or a small lantern with room to spare around the base, and small enough that four mats do not swallow a table. A mat much smaller looks mean under a large jar, and a mat much larger competes with the plates. Twenty-five centimetres is the size that works under almost every candle a house actually owns.
Why quilted, not just a single layer?
A single layer of cotton wrinkles under a heavy jar and slides across a polished table. Quilting adds body, so the mat lies flat, and it adds a layer of padding, so the table is protected from warmth. The quilting also gives you the chance to show off a Christmas print properly: diagonal lines across a red print read as deliberate, expensive-looking texture.
What you need before you start
Fabric and batting
You need an outer cotton, a backing cotton and a light batting for each mat. Christmas prints with small or medium motifs work best, because a 25 cm square will crop a large motif in odd places. For the backing, a plain cream keeps the mat reversible in practice, even if you only ever show the pretty side. Light cotton batting is the right weight here; heavy batting makes mats stiff enough to curl at the edges.
Binding
Each mat needs about 1.1 metres of binding, cut 6 cm wide, or roughly 4.4 metres for the set. A contrasting binding frames each mat beautifully — sage green against a red print is a classic Christmas combination — and it finishes every raw edge in one step. Binding cut from your own fabric looks more considered than ready-made, and it costs less.
Step 1: Layer, baste and quilt
Layer in the right order
Lay the backing face down, then the batting, then the outer fabric face up. Smooth each layer outward from the centre so there are no wrinkles trapped inside. Pin or baste every 10 cm. This step feels tedious, and it is the step most beginners skip, but it is also the step that prevents puckers. A mat quilted without basting will shift, and the shift shows up as a wrinkle right across the middle of the finished piece.
Quilt diagonal lines
Quilt diagonal lines about 4 cm apart, working from the centre outward. Straight lines are easier than free-motion quilting and they suit Christmas prints perfectly, because the diagonal grid reads as intentional texture rather than competing with the print. Use a walking foot if you have one, but a regular foot works if you baste well and sew slowly. Keep your stitch length a little longer than for garment sewing, around 3 mm, so the quilting does not pucker the fabric.
Trim to size
After quilting, trim each square to exactly 25 cm by 25 cm and square the corners. This is the moment the set starts to look like a set. If one mat is 24 cm and another is 26 cm, nobody will notice on the table individually, but stacked together the difference is obvious. Measure twice, trim once, and trim all four from the same template if you can.
Step 2: Bind with mitred corners
One run, mitre each corner
Sew the binding to the front of each mat in one run, leaving a tail at the start to join neatly at the end. At each corner, fold the binding into a mitre so the corner lies flat and square, and press the fold before continuing. A mitre pressed flat stays flat, but one sewn over a fold will always puff up, and a puffed corner is a mat that will never lie flat under a candle.
Stitch the back edge evenly
Fold the binding to the back and slip-stitch or topstitch it down, keeping the stitch line even all the way round. The back edge matters more on a candle mat than on most projects, because mats get picked up, moved and turned over constantly. An even back edge means the mat looks finished from every angle.
Step 3: Press, centre and safety check
Press and check the set
Press all four mats flat and stack them, checking that every mat measures the same 25 cm square. If one mat is a few millimetres out, re-trim and re-bind that one before the set is finished. A set only reads as a set when the sizes match, and the recipient will compare them, even if they do not mean to.
Centre the candle
Centre a candle or jar on each mat and check the mat sits flat under it without curling up at the edges. A mat that curls under a jar is a mat that was not pressed flat, or a mat whose binding is pulling. Press again, and if the curl persists, add a small stitch through the binding at the curling corner to hold it down.
The safety check that matters
Use these mats under candle jars and lanterns only, never under a naked flame close to fabric, and never leave a burning candle unattended. Keep the candle centred, not near the binding: a jar that sits on the binding will tilt, and a tilted jar is a spill waiting to happen.
Mistakes that spoil an otherwise good mat
Skipping the basting
The most common mistake is quilting without basting, because a 25 cm square feels too small to bother with. It is not. A shifted layer on a candle mat shows as a wrinkle right where the candle sits, and the candle will rock on a wrinkle.
Binding that is too narrow
Binding cut too narrow is hard to fold to the back and harder to stitch down neatly. Cut it 6 cm wide, not 5 cm. The extra centimetre costs nothing and makes the difference between binding that fights you and binding that behaves.
Prints that fight the quilting
A very busy, large-scale print plus dense quilting equals visual noise. If your outer fabric is loud, quilt wider apart. If your outer fabric is quiet, quilt closer together. Let one of the two do the talking.
Ways to make the set your own
Mix prints, keep the binding constant
Four mats in four different Christmas prints, all bound in the same sage green, look like a designed collection rather than four leftovers. This is also the fastest way to use up a scrap basket: each mat needs so little fabric that a fat quarter yields several.
Mats that earn their place on the table
Quilted candle mats are small, fast and genuinely useful, which is a rare combination in Christmas sewing. They use scraps, they teach quilting and mitred corners on a forgiving scale, and they turn an ordinary candle into a centrepiece. Make the set of four, keep the binding consistent and trim every mat to the same 25 cm square.
Ready to sew the set? The full pattern with the true-size mat template is here: Quilted Christmas Candle Mats Sewing Pattern. And for a bigger project in the same skills, read How to Sew Quilted Christmas Fabric Baskets next.