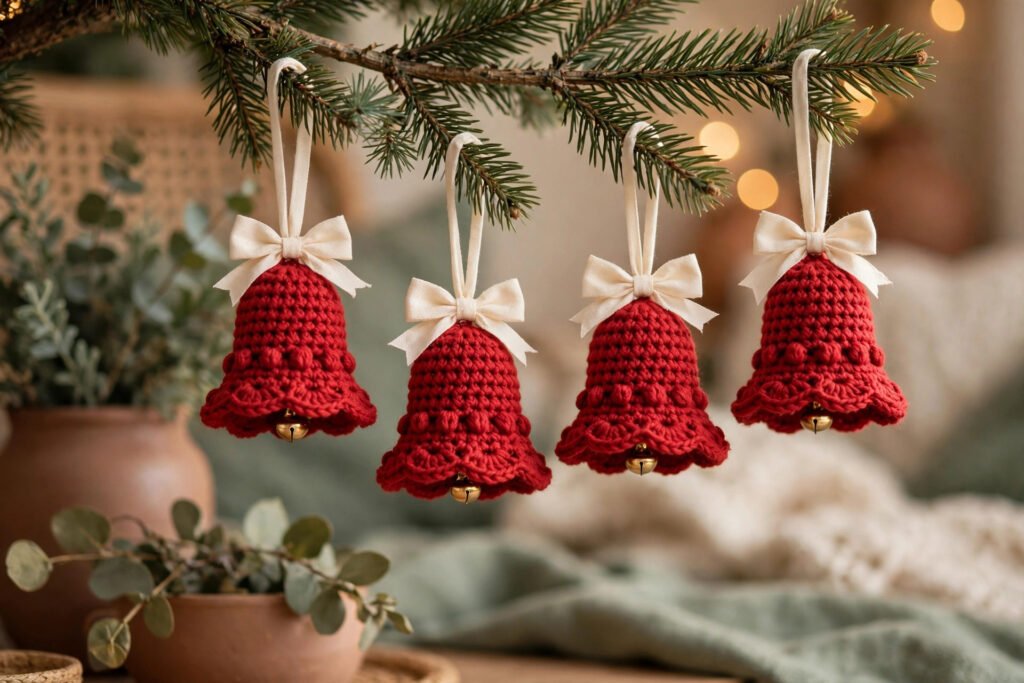
Why bells are the friendliest ornament to crochet
A bell is one of the most forgiving shapes in crochet. It is worked in the round, it has no arms or legs to attach at odd angles, and its charm comes from its silhouette, not from fiddly detail. That is why crochet christmas bell ornaments for beginners make such a good first amigurumi-style project. If you can chain, single crochet, and increase, you can make a bell, and four bells in one evening gives you a set worth hanging.
The bells in this guide finish at about 8 cm tall, not counting the hanging loop.
Start with gauge, not with the first bell
The test square that saves the set
Many beginners want to skip straight to the pretty bell, but gauge is the foundation everything else depends on. Work a test square first and count stitches across 10 cm, because you want 20 stitches for these bells so the shape holds firm and the stitches do not stretch open. If your count is loose, go down a hook size, and if it is tight, go up a hook size, until 20 stitches fill 10 cm. A bell crocheted too loosely will flop at the rim, and one crocheted too tightly will be hard to shape.
Keep one hook for the whole set
Keep the same hook and tension for all four bells, so the parts match when they are finished. A set of bells in four slightly different sizes looks like four separate experiments, not a set. Work the bodies assembly-line style: all four bodies first, then all four clappers, then all four bows. That rhythm keeps your tension consistent, because your hands settle into the same motion and stay there.
Crochet the bell body from the top down
Each bell is worked in the round from the top down, starting narrow and increasing gently so the body flares into a bell rim. The increases are the whole trick: too few and the bell looks like a tube, too many and it flares into a skirt. Increase steadily, one round at a time, and check the shape against your hand as you go. A bell should look like a bell from every angle, not just from the front.
Stuffing is barely needed for a bell, because the shape is open at the bottom and holds itself. If you use a bead clapper, you need no stuffing at all. If you use a yarn-ball clapper, stuff it very lightly, just enough to hold a round shape without stretching the stitches. Overstuffing stretches the stitches and shows fibre through the yarn, which is especially visible on red yarn. Squeeze each clapper gently after stuffing. It should spring back, not stay dented.
Add the clapper, the bow, and the loop
A clapper that swings free
Hang each clapper from the inside top of its bell on a short cord, centred, so the bell hangs straight and the clapper swings free without catching the rim. A clapper hung off-centre will pull the bell sideways on the tree, and the whole ornament will look tipsy. Test the swing before you sew the cord in permanently: hold the bell up and flick the clapper gently, and watch that it moves freely and settles back to centre.
A bow that does not pull the bell over
Sew a small cream bow to the top of each bell, keeping the bow small so it does not pull the bell sideways when it hangs. A large bow can overwhelm an 8 cm bell and can also drag the hanging loop off-centre. If you prefer a plainer look, skip the bow and let the red body and gold clapper do the work. Both versions look finished, as long as the clapper is centred and the rim is even.
A loop that holds all season
Fold a 12 cm length of ribbon into a loop and sew it to the top of each bell through at least two stitches. Sew the loop in with the same yarn as the bell top, because a contrasting thread line across the top reads as a mistake. Knot it securely on the inside, and tug it firmly before you hang the bell. A loop that pulls out on Christmas morning is a small frustration that is easy to prevent with one extra pass of thread.
Getting the shape and tension right
Tension matters more for small ornaments than for scarves, because a small change in size changes the proportions of the whole piece. If your bell comes out much larger than expected, your stitches are loose. Try a smaller hook rather than pulling your yarn tighter, which tires your hands and can make the stitches uneven. Work a small test piece first if you are using a new yarn, and compare it with the size you want before committing to four bells.
Check each rim edge as you finish it, because a rim that dips on one side is the first thing anyone notices on a tree. If a rim dips, it usually means one round had an extra increase, or a stitch was missed near the end of the round. Count your stitches at the end of every round for the first bell, and the other three will go faster, because you will know the counts by heart.
Making a set for gifts and for your own tree
Bell ornaments make wonderful gifts because they are quick, personal, and easy to post. Crochet the bodies in a batch first, then the clappers, then the bows, so you work assembly-line style and keep the tension consistent across the set. Vary the bow colour or the hanging ribbon to give each bell its own character without changing the basic pattern, so a set of four still reads as a set.
A set of four bells, tucked into a small gift box with tissue paper, looks far more thoughtful than a single shop-bought ornament. They also make lovely decorations for a first home, a classroom tree, or a Secret Santa gift that actually gets kept. For a larger statement piece in the same green-and-red palette, the How to Crochet a Christmas Wreath guide uses the same ring and leaf skills on a 30 cm scale. For the full set with stitch counts and assembly diagrams, the Crochet Christmas Bell Ornaments Pattern gives you a full illustrated PDF instant download, with every piece charted step by step.
Mistakes that spoil an otherwise good bell
Increasing too fast
The most common mistake is increasing too fast, which turns a bell into a frill. Add increases gradually, and hold the bell up after every few rounds to check the silhouette. A bell shape should widen slowly, then flare a little more at the very rim. If it flares halfway down, frog back to the last good round and increase more slowly.
An evening project with a real payoff
These bells are an evening project, not a weekend commitment. Make the bodies, add the clappers and bows, hang them on the tree the same night if you like. The skills are all beginner-level: chains, single crochet, simple increases, and a little sewing. None of them needs to be perfect to look good, because the overall bell silhouette and the festive colours do most of the visual work.
Ready to start? Choose a red you love, work the test square first, keep the clapper centred, and keep the bow small. The result will be four little bells that hang straight, swing free, and come back out every December looking just as cheerful as the year you made them.
Ready to crochet the set? Get the Crochet Christmas Bell Ornaments Pattern and read How to Crochet a Christmas Wreath next.