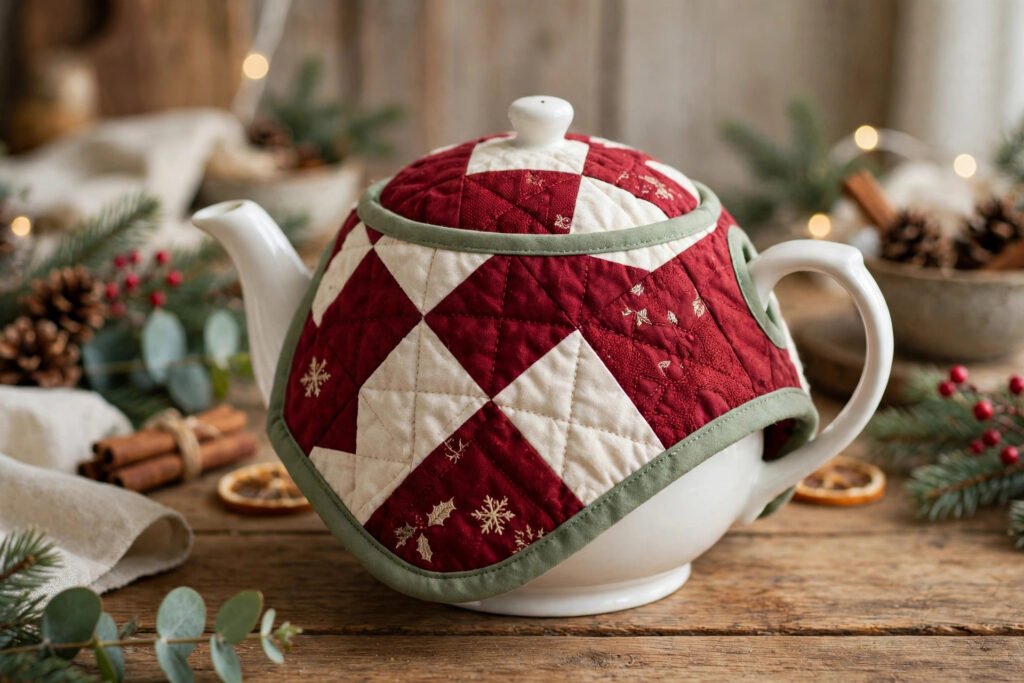
There is a special kind of disappointment in pouring a second cup of tea and finding it lukewarm. A tea cosy solves that problem, and a quilted Christmas tea cosy solves it while looking like it belongs on a festive table. Learning how to sew a quilted christmas tea cosy is a satisfying weekend project: the pieces are small, the quilting is simple, and the result is something you will actually use every day through December.
The design in this guide fits a standard 1-litre teapot and finishes at about 28 cm tall x 24 cm wide. That size matters. A cosy that is too tight will not slide over the pot, and one that is too loose will let heat escape around the edges. Measuring your own teapot first, and comparing it with these finished dimensions, is the step that turns a pretty cover into a working one.
Why Quilting Makes a Better Tea Cosy
A single layer of cotton looks nice but does almost nothing to keep tea warm. Quilting traps air between the layers, and trapped air is what insulates. Two layers of cotton with a layer of batting between them will keep a pot of tea hot noticeably longer than a thin cover, and the cosy itself will hold its shape instead of flopping flat.
Quilting also gives the cosy structure. A quilted cosy stands up on its own, sits neatly over the pot, and keeps its dome shape even when it is not in use. If you want the full printable version, the Quilted Christmas Tea Cosy pattern on loomvella.com gives you the illustrated step-by-step guide as a PDF instant download, with full-size templates for the 28 cm tall x 24 cm wide shape included.
Choosing Fabric and Insulation
Choose quilting cotton for the outside. It is stable, presses well, and comes in endless Christmas prints, from classic red and green to more modern cream and gold designs. For the lining, pick a plain cotton that will not show tea stains too badly. A mid-tone print or a warm solid is a practical choice.
For insulation, use cotton batting, or a heat-resistant batting if you have it. Standard low-loft cotton batting works well for a tea cosy, because the cosy does not need to withstand oven temperatures, only to slow heat loss. Avoid very thick batting, which makes the cosy stiff and hard to turn right side out. One layer of batting in each side piece is enough, and it keeps the finished cosy flexible.
Measuring Your Teapot Before You Cut
The Three Measurements That Matter
Measure three things on your teapot. First, the height from the base to the top of the lid knob. Second, the width across the widest part of the body, ignoring the handle and spout. Third, the distance from the table up to where the handle and spout stick out, because the cosy needs openings for both.
A standard 1-litre teapot measures roughly 22 to 24 cm across the body and about 20 cm tall to the lid knob. The finished cosy in this guide, at about 28 cm tall x 24 cm wide, leaves room for the batting, the seam allowances, and a little ease so the cosy slides on and off without a struggle. If your teapot is much larger or smaller than a standard 1-litre pot, scale the template up or down by the difference before cutting.
Cutting the Side Pieces
Cut two identical side pieces for the outer fabric, two for the lining, and two for the batting. The side pieces are shaped like a wide dome, flat at the bottom and curved at the top, with small notches or openings marked where the handle and spout will pass through. Transfer every marking to the fabric before you start sewing, because the openings are much harder to place correctly once the pieces are quilted.
Quilting the Outer Pieces
Quilt each outer piece before you assemble the cosy. Lay the outer fabric right side up, place the batting underneath, and stitch a simple pattern across the piece. Diagonal lines are a classic choice and suit Christmas fabric well, but straight vertical lines or a simple diamond grid work just as well. Keep the lines about five centimetres apart so the quilting holds the layers together without making the piece stiff.
Use a walking foot if you have one, because it feeds the layers evenly and prevents puckering. If you do not have a walking foot, pin generously and sew slowly. Press each quilted piece well, and trim any batting that extends beyond the fabric edge. A neatly trimmed piece is far easier to join accurately.
Sewing the Handle and Spout Openings
The openings are the fiddliest part of the project, so take them slowly. The cosy has a gap on each side: one for the handle, one for the spout. These gaps are finished with binding or by turning the edges under and topstitching, so the raw edges are enclosed and the openings keep their shape.
Joining the Cosy and Adding the Lining
Place the two quilted outer pieces right sides together and sew around the curved top edge, leaving the bottom open. Clip the curves lightly so the seam lies smooth when turned, then turn the outer shell right side out and press it. The dome shape should already look like a cosy at this point, which is a satisfying moment.
Make the lining the same way, but leave a small gap in one seam for turning. Slide the lining inside the outer shell, wrong sides together, and align the bottom edges. Topstitch around the bottom edge to close the cosy and secure the lining in place. The topstitching also gives the bottom edge a crisp finish that helps the cosy sit flat on the table.
Adding a Loop and Final Details
Press the finished cosy one last time, using steam on the cotton setting. Check that both openings are neat, that the bottom edge sits flat, and that the cosy slides easily over your standard 1-litre teapot. A well-made cosy should go on and come off with one hand, without tugging.
Caring for Your Finished Cosy
Tea cosies do get splashed, so washability matters. Machine wash the cosy on a gentle cycle in cool water, and dry it flat or on a low heat. Avoid very hot water, which can shrink cotton batting and make the cosy tighter over time. If the cosy loses its crisp shape after washing, a quick press with steam will restore it.
If you enjoy making coordinated Christmas sewing, the matching wall project in How to Sew a Quilted Christmas Wall Hanging in Three Blocks uses the same quilting skills, so it makes a natural second project once the cosy is done.
A Practical Gift That Gets Used
A tea cosy is one of the rare handmade gifts that gets used daily rather than admired once and stored away. It is quick to make, uses small amounts of fabric, and suits almost anyone who drinks tea. Make one for yourself first to check the fit on your own teapot, then make more as gifts, changing the fabric for each person.
The skills are all beginner-friendly: straight seams, simple quilting lines, and a little binding or topstitching around the openings. None of them needs to be perfect to look good, because the festive fabric and the quilted texture do most of the visual work.
Ready to make yours? Get the full illustrated Quilted Christmas Tea Cosy pattern as a PDF instant download on loomvella.com, with full-size templates, fabric requirements, and step-by-step diagrams for every stage above.